I’ve started building a four legged walking robot, imitating the movements of a turtle. I named it the TortoBot (Tortoise Bot), but as it developed it started to look more like a dinosaur baby. Now, I call it the BrontoBot. This post describes the building of the robot body, using 9g servos, melting plastics and good old fashioned glue.
Later posts will describe the making of the pcb, programming the movements and further upgrades.
Video
Inspiration
The BrontoBot (Brontosaurus roBot) is inspired by this robot built by CrabFu, a well known robotics builder. I liked the charming way his robot moves, and wanted to make a similar robot. His robot is remote controlled, so all moves it makes are done by the person controlling it. I want my robot to be programmable, using a microcontroller to do the movements by itself.
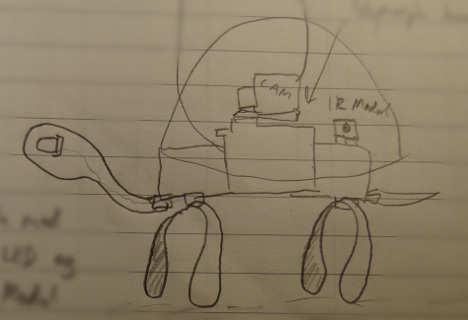
The concept
This is the concept “art” that I made before starting the robot.
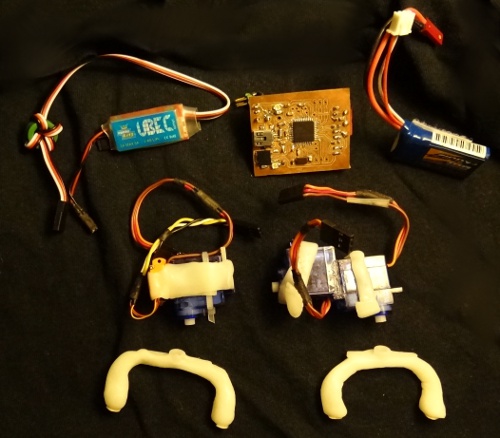
– 3x Servos
– Microcontroller card
– UBEC Voltage regulator
– 2-cell LiPo battery
– Polymorph legs and mounts
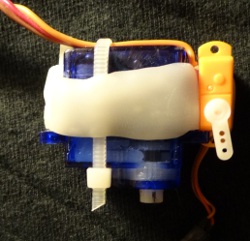
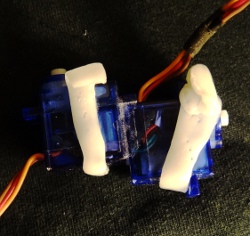
The body
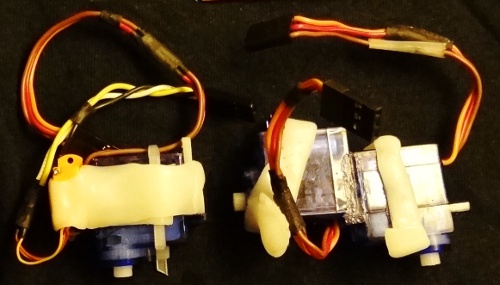
Three servos make up the body, driving the front legs, back legs and waist. I’m planning to make a turtle shell from styrofoam to wrap in the electronics, so the robot looks less like a moving ball of wires.
I sanded all surfaces before I glued them to make the glue grip better.
The legs
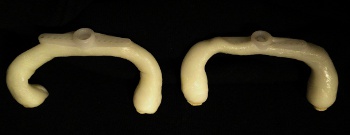
I started by attaching a wire to the servo horn, making steel legs. I then proceeded to melt the polymorph and work it around the legs. I made sure that the legs were of equal length by warming all three of them and then pushing them on a flat surface. I finished the legs by gluing on little pads of sand paper to increase the friction. The legs can be pulled off the servos, so it’s easier to transport without breaking. They can also easily be replaced by other legs, for instance if I want to make them bigger.
Polymorph vs Shapelock
As I’ve had the luxury to try both these plastics, I’ve compared them a little. I’ve found that shapelock is stickier to work with, and will attach easier to other plastics. It seems it’s also more flexible when it has hardened. Polymorph holds details better, and the result is harder. For these reasons, I personally prefer polymorph.
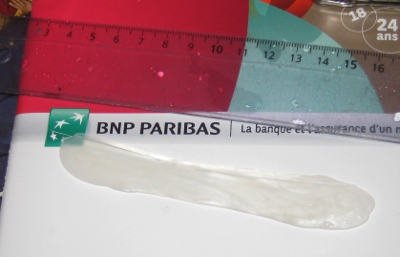
I like to squeeze rolls of polymorph with a transparent ruler to make flat stripes. I then cut the edges with a sharp knife to make them straight.
Balancing the robot
When running the robot for the first time, I realized that it is very important to balance the weight evenly between the legs. As the robots movement to some extents depend on the legs to slip, . The friction also increases as the robot gets heavier, so I’m not sure the sand paper pads were such a good idea after all. If there is to much weight on the rear, the robot looses some of its charm as it looks like it is dragging its rear legs.
The head
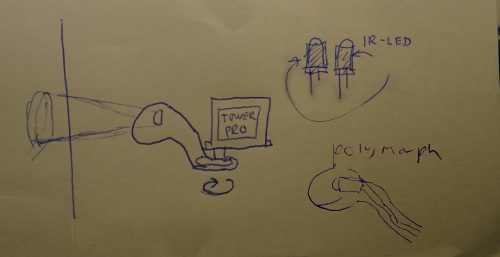
Here is a draft of what I wanted the head to look like when it’s finished. I want to put a IR-led transmitter/receiver pair as eyes, to detect obstacles. So far I’ve only mounted the micro servo, so I’ll update this post once the head is finished. I’m thinking the head should be detachable from the neck, maybe by a screw.
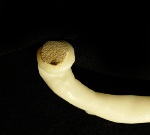
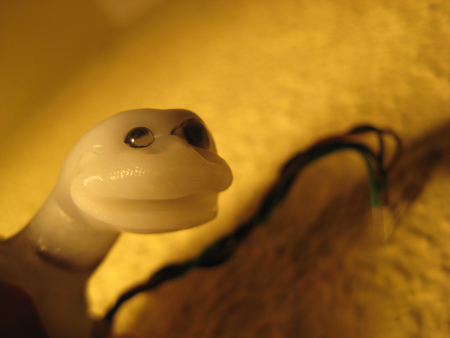
UPDATE: The head
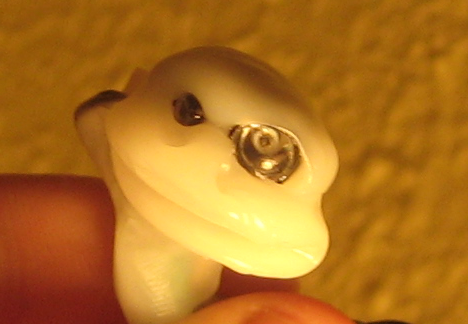
I’ve built the BrontoBot head now. Inside I put an IR-led (right) and an IR transistor (left). I soldered them both to single core wires, and covered them nicely with heatshrinking tubes. Then I shaped a polymorph head around them, with a little mouth to give the robot more personality.
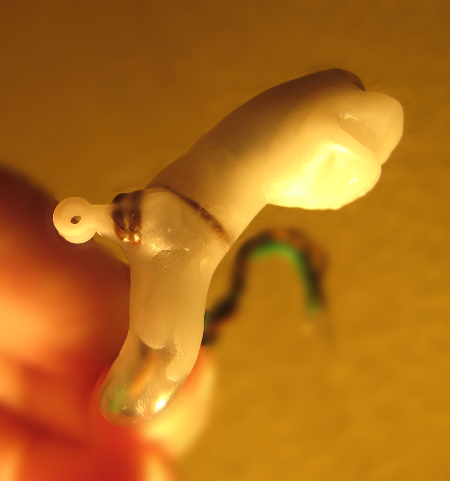
To make the neck, I started by creating a skeleton of single core wire to support the polymorph while it hardens. This wire is attached to a servo horn, and aligned so the head can move up and down. Finally I shaped hot polymorph around the wire.
Misc

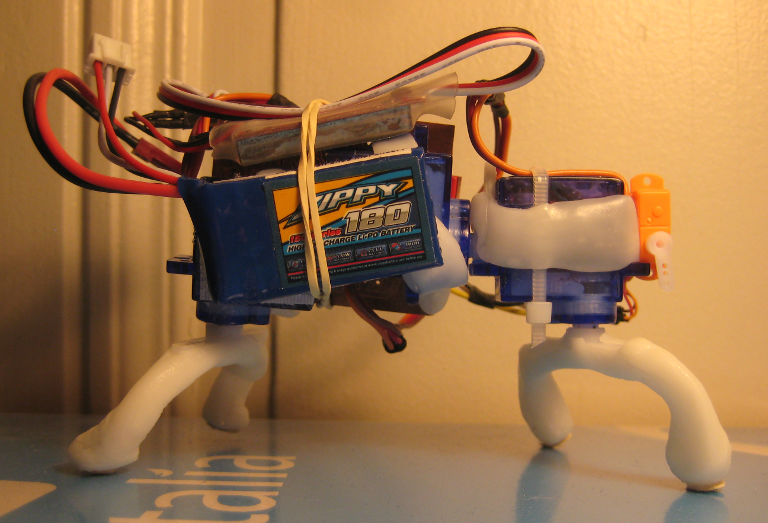
Attaching battery and electronics
I made polymorph mounts around the servos to insert the pcb.
The battery is attached by velcro tape, and a rubber band holds it all in place.
Shortening servo wires
I don’t have the equipment necessary to attach new servo connectors on the servos, so I chose simply to cut off the extra wires and splice them afterwards. I did this by soldering, and used two layers of heat shrinking tube to make them strong.